10. Stacked Solar Puck Light Towers
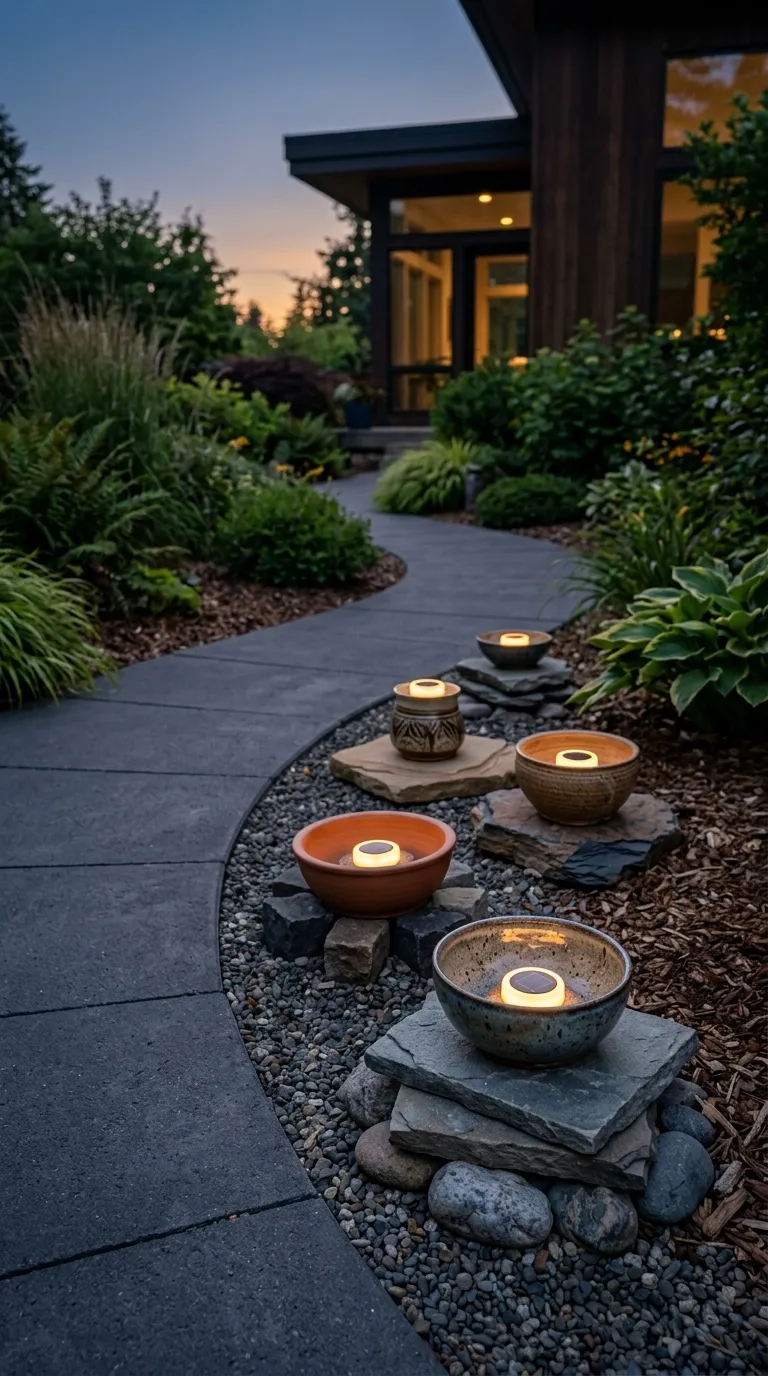
Last but definitely not least, this is one of my favorite projects for a more sculptural, modern look. Stacking small solar puck lights inside or on top of decorative objects creates depth and a layered lighting effect. It also lets you swap out the base as your style or season changes.
Materials: Solar puck lights (the small, flat kind), decorative bases such as upside-down bowls, small planters, lanterns, or stacked wooden discs, outdoor adhesive or mounting putty.
How to make them: Choose a base that has a flat top and enough space for the puck light to sit securely. A small ceramic bowl turned upside down works beautifully, as does a flat river stone or a square of weathered wood. Mount the puck light to the top of the base using outdoor adhesive or removable mounting putty. Place along the path with varied heights and shapes for visual interest.
Time: 30 minutes to 1 hour
Difficulty: Beginner
Customization: Change the bases seasonally. Pinecones and birch bark in the fall, smooth white stones in summer, mossy pieces in spring. You can also use colored solar lights for a fun, playful effect for parties or holidays.
These are wonderfully low-maintenance. The solar panels charge during the day, and the lights come on automatically at dusk. Set them once and enjoy them all season long.
Pro Tips for DIY Garden Pathway Lights
Mix and match styles rather than using the same light all the way down a path. The eye enjoys variety, and a mix of lanterns, torches, and ground lights feels more curated and personal.
Layer your lighting at different heights. Ground-level lights guide feet, mid-level lights set the mood, and overhead or hanging lights create atmosphere. The most inviting garden paths have all three.
Always use LED or solar options if you have pets, kids, or wildfire concerns. Real flame is gorgeous, but the safety and convenience of flameless lights is hard to beat for everyday use.
Think about your power source before you start. Solar lights need at least a few hours of direct sun. If your path runs through heavy shade, look for battery-operated or low-voltage wired options instead.
Frequently Asked Questions
What is the cheapest way to light a garden pathway?
Mason jar solar lights and glow-in-the-dark painted pebbles are the most budget-friendly options. Both can be made for under five dollars per light, and the pebbles last for years with occasional recharging in the sun.
Are solar pathway lights bright enough to actually light a path?
Modern solar lights are surprisingly capable. While they won’t floodlight your entire yard, they provide enough soft glow to mark a path clearly and make walking safe. If you need more brightness, look for solar lights with higher lumen counts or add reflective markers alongside them.
How do I keep DIY outdoor lights from getting ruined by rain?
Use weatherproof sealants on any painted or decorated elements, choose outdoor-rated solar panels and battery compartments, and store delicate glass or ceramic pieces in extreme weather. Most quality solar lights can handle rain just fine.
Can I leave DIY pathway lights out all year?
Most can, but their lifespan will be longer if you bring glass pieces in during freezing temperatures and store solar lights during the harshest winter months. Materials like copper and terracotta handle weather cycles beautifully and can stay out year-round.
How far apart should I place pathway lights?
For a soft, ambient glow, place them every 6 to 8 feet. For a more functional, well-lit path, every 4 to 5 feet works better. The closer the lights, the brighter and more defined the path will feel.
Do I need any special tools for these projects?
Most of these projects only need basic tools like a hammer, scissors, hot glue gun, and a screwdriver. The copper pipe and tin can projects are the exceptions and may need a pipe cutter, drill, or awl.
What can I do with old solar lights that have stopped working?
Many older solar lights just need a new rechargeable battery or a quick clean of the solar panel. If they’re truly done, repurpose the housing as a decorative cage and tuck a fresh LED puck light inside.
There’s something special about walking through your own backyard at night and seeing the glow of lights you made with your own hands. Each of these DIY garden pathway light ideas brings its own personality to your outdoor space, and the best part is how easily they can be mixed, matched, and adapted to fit your style and your garden’s unique shape.
Pick one project that excites you most, gather your materials, and give yourself a relaxed afternoon to put it together. Once you see how much warmth and charm even a single well-placed light can add, you’ll probably find yourself reaching for the next idea before the sun even sets. Your pathway, and your evening strolls, will never be the same.