10. Toy Box Bench with Chalkboard Front
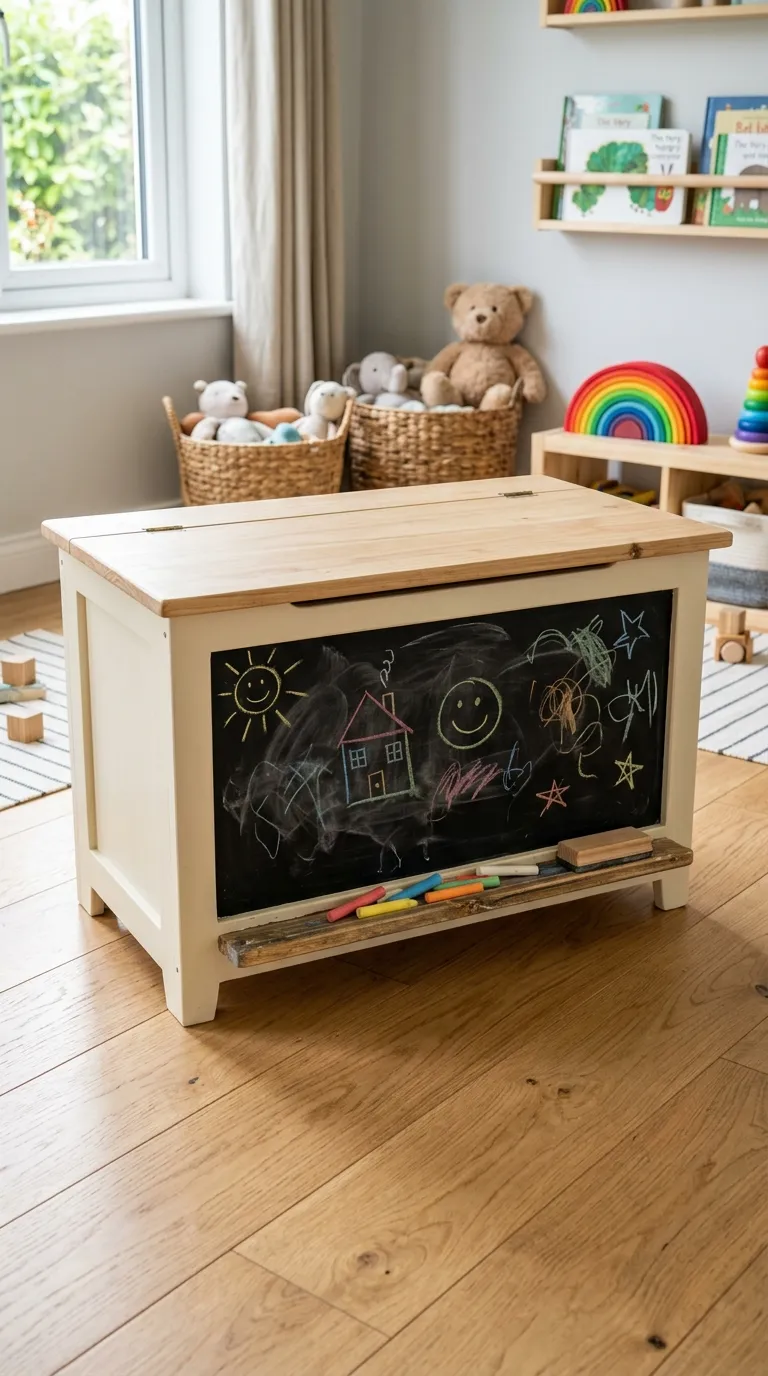
For a playroom that encourages creativity, a toy box bench with a chalkboard front is endlessly entertaining. The front panel is painted with chalkboard paint, giving kids a built-in canvas to draw, practice letters, or leave little love notes for the family. It is functional, fun, and surprisingly easy to make.
Materials include plywood for the main box, MDF for the front chalkboard panel, chalkboard paint, hinges, wood screws, and a soft clear sealer for the rest of the box. The build takes about four hours, plus drying time for the chalkboard paint, which is best applied in two thin coats.
Build the box as usual, but before assembling the front, paint the MDF panel with two coats of chalkboard paint. Let it cure for at least 24 hours, then condition the surface by rubbing the side of a piece of chalk all over it and wiping it off. This preps the surface for easier drawing and erasing later on.
To make it even more functional, attach a small ledge at the bottom of the chalkboard panel to hold chalk and an eraser. Some families also add a thin strip of cork board along the top for pinning up artwork. The rest of the bench can be painted in a complementary color, like a soft cream or sage green, to let the chalkboard front be the star.
💡 Pro Tip: Choose a magnetic chalkboard paint if you want to add small magnetic letters and numbers. It costs a bit more but turns the front of the bench into an interactive learning surface.
What kind of wood is best for a DIY toy box bench?
Pine and plywood are the most common choices because they are affordable, easy to cut, and light enough for kids’ furniture. For a more durable or upscale look, poplar, birch plywood, or even reclaimed oak are excellent options. Whichever wood you choose, make sure to seal it with a child-safe, low-VOC finish.
Are toy box benches safe for toddlers?
Yes, as long as you build with safety in mind. Use soft-close hinges to prevent pinched fingers, sand all edges round, and avoid small hardware that can come loose. Drill pocket holes on the inside so no screws are exposed, and skip toxic finishes. Always anchor taller units to the wall to prevent tip-overs.
How long does it take to build a wooden toy box bench?
Most projects take between three and eight hours of actual building time, not counting drying time for paint or stain. A simple plywood design can be finished in an afternoon, while more involved builds like a window seat or bookshelf hybrid may require a full weekend.
What is the average cost of a DIY wooden toy box bench?
Costs vary based on materials and size, but most DIY versions range from about 50 to 200 dollars in materials. Reclaimed wood projects can be even cheaper if you have access to free materials, while a high-end plywood build with a custom cushion might push toward the higher end of that range.
Can I build a toy box bench without power tools?
You can, but it will take longer. A hand saw, a drill, sandpaper, and a screwdriver can handle most basic builds. Many home improvement stores also offer wood cutting services for a small fee, so you can have your pieces pre-cut and only need to focus on assembly at home.
How do I keep the inside of a toy box from getting musty?
Drill a few small air holes in the back or sides of the box to allow airflow. Avoid storing damp items inside, and consider adding a small cedar block or lavender sachet to keep things smelling fresh. If the bench is in a particularly humid room, a dehumidifier nearby can help.
What finish should I use on a kids’ toy box bench?
Look for water-based, low-VOC finishes that are labeled child-safe once cured. Options include water-based polyurethane, hardwax oil, or food-safe mineral oil for natural wood. Avoid oil-based stains or varnishes that off-gas strong fumes, and always allow plenty of curing time before letting kids use the bench.
There is something deeply satisfying about building a piece of furniture that becomes part of your family’s daily life. A wooden toy box bench is more than just storage. It is the spot where your child builds their first LEGO tower, reads their first chapter book, or hides their most treasured secret from the rest of the world. Choosing to build it yourself adds a layer of meaning that no store-bought version can match.
Start with the design that caught your eye, gather your materials, and give yourself permission to take your time. Add your own flourishes, whether that is a custom paint color, a hand-stenciled name, or a special knob from a flea market. The best version of any of these ideas is the one that reflects your family. Once it is done, pull up a small stool, watch your kids light up, and enjoy the kind of quiet moment that makes a house feel like home.