10. Fairy Garden Door Rocks
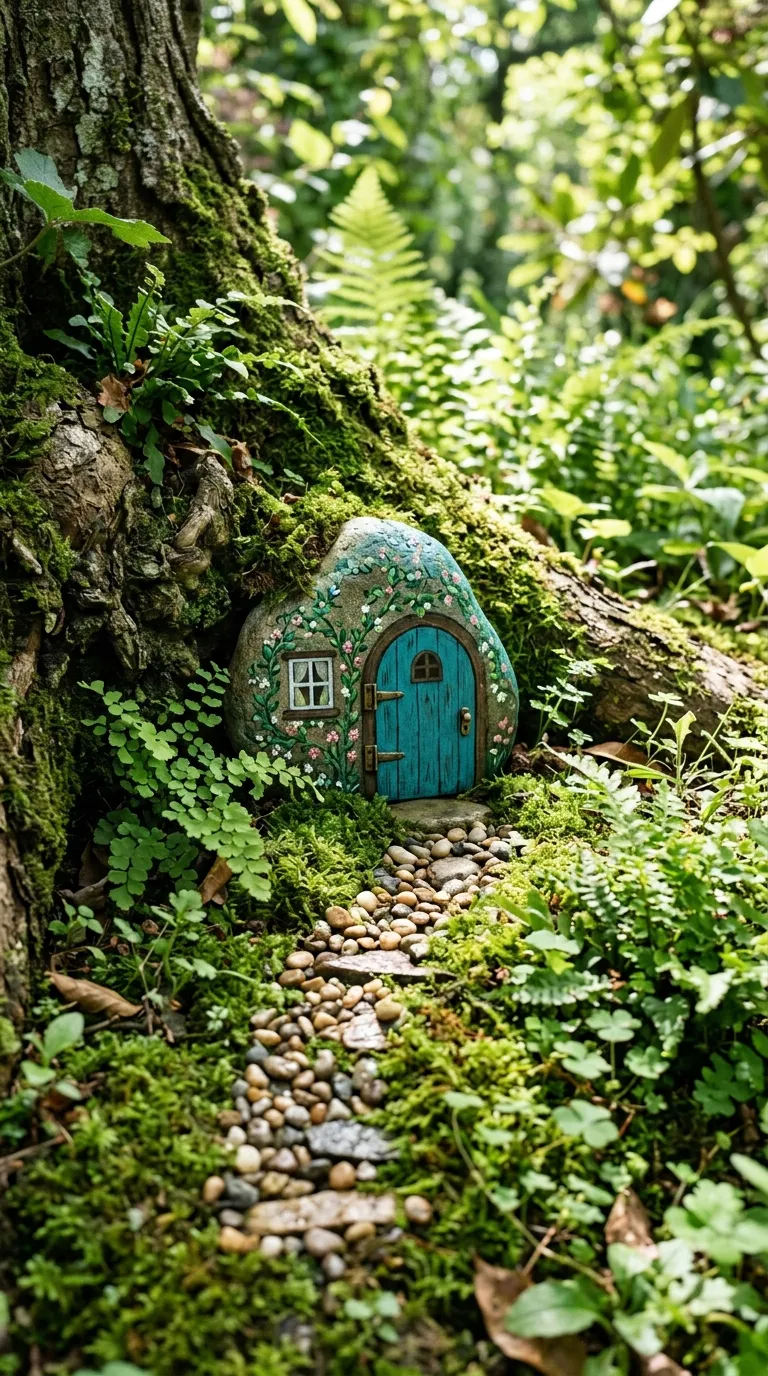
A fairy garden door rock is a tiny doorway painted onto a flat stone. Place it against a tree trunk, a potted plant, or a garden wall, and suddenly the space feels magical. This project is perfect for beginners who want to add a touch of storybook whimsy to their garden or home.
Materials: flat rocks, acrylic paint in brown, green, gray, and a bright door color, fine brush, clear outdoor sealer, optional moss and tiny pebbles.
Instructions:
- Paint the rock with a stone-gray or earthy brown base.
- Paint a rounded rectangle for the door in a bright color like teal, red, or yellow.
- Add a small window, a doorknob, and thin lines for wood planks.
- Paint green vines or tiny flowers around the door.
- Seal the rock with an outdoor sealer and place it in the garden.
Time: 30–45 minutes. Difficulty: Beginner. Customization: Make a whole fairy village with different door colors and sizes. Add a tiny painted welcome mat or a miniature lantern. Display ideas: Tuck doors between plant roots, lean them against fairy houses, or place them in a terrarium. Budget alternative: Use a permanent marker for the smallest lines, then seal over it. Common mistake: Skipping outdoor sealer. Rain and sun will fade unprotected paint quickly.
Frequently asked questions
What kind of paint is best for painting rocks?
Acrylic paint is the most popular choice because it sticks to smooth stones, dries fairly quickly, and comes in many colors. Acrylic paint pens are excellent for fine details and lettering. For outdoor rocks, choose a paint labeled for outdoor use or seal the finished rock with a clear acrylic sealer.
Do I need to seal painted rocks?
Sealing is not always required for indoor rocks that will not be handled much, but it is strongly recommended. A clear sealer protects the paint from moisture, sunlight, and scratches. For rocks that will live in the garden or be hidden outdoors, use an outdoor-grade sealer and apply it to all sides.
How do I prepare rocks before painting?
Wash the rocks with warm water and a little dish soap to remove dirt and dust. Let them dry completely. If the surface feels very smooth or shiny, you can lightly sand it with fine sandpaper and wipe it clean. A dry, clean rock helps the paint adhere better.
Can beginners paint rocks without artistic skills?
Yes. Many rock painting ideas rely on simple shapes, dots, and color blocking rather than realistic drawing. Start with ladybugs, fruit, or kindness rocks. Use a pencil to sketch your design first, and keep a damp paper towel nearby to wipe away mistakes before the paint dries.
Where can I find smooth rocks for painting?
Garden centers, craft stores, and dollar stores often sell smooth river rocks. You can also look along riverbanks, beaches, or hiking trails, but check local rules before removing natural items. Hardware stores sometimes sell decorative stone by the bag, which is a good option for larger projects.
How long do painted rocks last outdoors?
With a proper outdoor sealer, painted rocks can last for months or even years, depending on the weather. Harsh sun, heavy rain, and freezing temperatures will eventually wear them down. To extend their life, apply two thin coats of sealer and bring them inside during extreme weather if possible.
What are common mistakes to avoid when painting rocks?
Painting too thickly is the most common mistake. Thick paint cracks, peels, and takes much longer to dry. Other mistakes include skipping the base coat, using too much water, handling the rock before it is dry, and forgetting to seal outdoor projects. Work in thin layers and be patient between steps.
Rock painting is a hobby that welcomes everyone, no matter how much artistic experience you have. You can start with a single ladybug, a simple kindness rock, or a tiny fairy door, and let your confidence grow from there. The supplies are easy to find, the projects are flexible, and the finished pieces add a personal touch to your home, garden, or neighborhood.
Pick one idea that makes you smile, gather your rocks and paint, and give yourself permission to play. If a design does not turn out as planned, paint over it or turn it into something new. The best rock paintings are not the most polished ones; they are the ones that carry your own colors, words, and little moments of creativity. Enjoy the process, share a few rocks with others, and keep a few for yourself.